
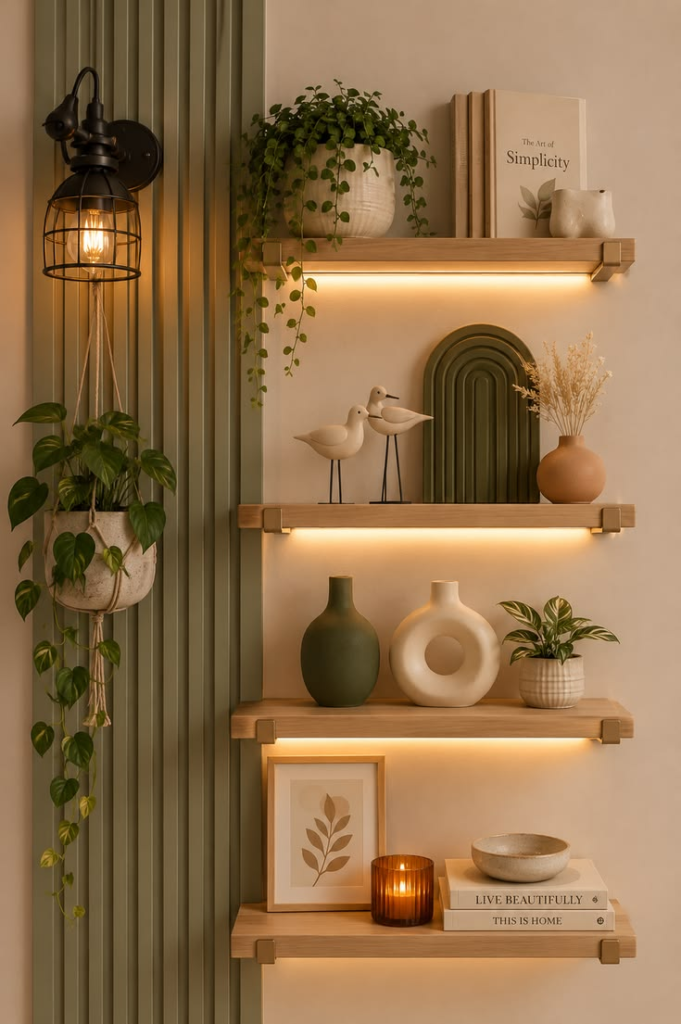
I put off installing floating shelves for almost two years because I assumed it was the kind of project that required skills I didn’t have. Drilling into walls, finding studs, making sure everything was level — it sounded like a project for someone with more experience.
Eventually I just tried it. Two hours later I had three floating shelves on a wall that had been completely bare, they were straight, they were solid, and the room looked entirely different. I wished I’d done it years earlier.
Here’s everything you need to know to do the same.
What Makes Floating Shelves Different
A floating shelf looks like it’s attached directly to the wall with no visible support. The brackets are either hidden inside the shelf itself or recessed into the wall, so the shelf appears to “float.”
This clean look is what makes them so popular — they provide real, usable storage and display space without the visual weight of a shelf unit sitting on the floor, and without visible brackets interrupting the clean line of the shelf.
They work in virtually every room: living room for books and plants, bedroom for small decor and nightstand alternatives, kitchen for spices and mugs, bathroom for toiletries and towels.
What You’ll Actually Need
The material list is short:
- Wooden plank — pine is affordable and widely available; the thickness should be at least 3cm for anything that will hold real weight
- Wall brackets — choose based on how much weight you plan to put on the shelf
- Screws and wall anchors — the anchors are what hold everything in the wall; use the right type for your wall material
- Drill — a basic drill is sufficient; you don’t need anything professional
- Spirit level — the most important tool on this list; a shelf that’s slightly off level looks wrong immediately
- Measuring tape and pencil — for marking positions accurately
- Sandpaper — for smoothing the wood before finishing
- Paint or wood polish — whatever finish you want
Step One: Plan Before You Drill
Measure the wall space carefully before doing anything else. Decide:
- How many shelves you want and the spacing between them
- The height of the lowest shelf — should be accessible but not awkward
- The width of each shelf and how much it will project from the wall
- Where the brackets will sit — for a wooden wall you can attach directly; for plaster or concrete walls you need to find solid support or use appropriate anchors
Sketch it on paper or mark lightly with pencil on the wall. Standing back and looking at it before drilling saves a lot of time and unnecessary holes.
Step Two: Prepare the Wood
Cut the planks to size if they haven’t come pre-cut. Most timber merchants will cut to size for you if you bring measurements — worth asking, especially if you don’t have a saw.
Once cut:
- Sand all surfaces, starting with a rougher sandpaper and finishing with a fine one
- Pay particular attention to the edges and corners — sharp edges look unfinished and are uncomfortable to touch
- Wipe away all dust with a damp cloth before applying any finish
Step Three: Finish the Wood
This is where you make the shelf look the way you want it to:
- Natural finish — a clear wood oil or wax brings out the grain and gives a warm, natural look. Works particularly well with pine or oak.
- White paint — two coats of matte white paint gives a clean, modern look that works in almost any room
- Dark stain — a wood stain in walnut or dark oak gives a richer, more sophisticated feel
- Black matte paint — increasingly popular, particularly in modern or industrial-influenced spaces
Let whatever finish you choose dry completely before installation. Handling a freshly painted shelf during installation almost always results in fingerprints in the finish.
Step Four: Install the Brackets
This is the step most people find intimidating, but it’s genuinely straightforward if you take it slowly.
Mark the bracket positions on the wall with a pencil. Use your spirit level to make absolutely sure the marks are aligned — this is the most important step in the whole process. An unlevel bracket means an unlevel shelf, and that’s visible from across the room.
Drill pilot holes first, then insert wall anchors if required, then screw the brackets into place. Check again with the spirit level after each bracket is attached.
The most common mistake is rushing this step. Take the extra few minutes to check alignment carefully. Once the brackets are in and the shelf is on, fixing an unlevel installation means starting over.
Step Five: Attach and Style the Shelf
Place the wooden plank on the brackets and secure it according to the bracket type — some require screws from underneath, some clip in, some simply rest on the bracket if there’s enough weight on the shelf.
Push it level against the wall and check once more with the spirit level. Then stand back and look at it from a distance before declaring it done.
How to Style Floating Shelves
The installation is the easy part. Styling shelves well is where most people either get it right or end up with shelves that look overcrowded and messy.
Principles that consistently work:
Leave space. Not every inch of the shelf needs to be filled. Gaps between items look intentional. Crowded shelves just look cluttered.
Vary the heights. A tall plant next to a short stack of books next to a mid-height candle creates visual interest. Everything at the same height looks flat.
Group in odd numbers. Three items or five items together look more natural than two or four.
Mix textures. A wooden object, a plant, and a ceramic item together is more interesting than three objects made of the same material.
One plant per shelf minimum. Even a small plant adds something living to the shelf that makes it feel complete.
Room-by-Room Ideas
Kitchen: Spice jars in uniform containers, a small plant, a couple of cookbooks. Keep it functional but neat.
Bedroom: A plant, a book you’re currently reading, a small lamp or candle. Replaces the need for a bulky bedside table.
Bathroom: Rolled towels, a small plant that handles humidity, one or two toiletries in attractive containers.
Living room: Books arranged by color or size, plants, a few meaningful objects. Don’t mix too many different categories.
Common Mistakes to Avoid
- Not using a level. This one mistake causes more visible problems than anything else. Use the level. Check it twice.
- Using anchors that are too small for the wall type. Plasterboard and solid concrete walls need different anchors. Get the right ones.
- Overloading the shelf. Floating shelves can hold good weight if properly installed, but they have limits. Don’t stack heavy books four rows deep.
- Rushing the finish. Drips, brush marks, and fingerprints in paint are visible on a shelf. Take the time to finish properly.
Frequently Asked Questions
Can I install floating shelves on any wall?
On most wall types, yes — but the method varies. Solid brick or concrete walls need masonry drill bits and anchors. Plasterboard (drywall) walls need specific plasterboard anchors or should be fixed into the studs behind the board.
How much weight can a floating shelf hold?
It depends primarily on how it’s anchored to the wall. A properly installed shelf with solid wall fixings can hold significant weight. The weak point is always the wall fixing, not the shelf itself.
What’s the best wood for DIY floating shelves?
Pine is the most affordable and easy to work with. Oak is more expensive but more durable and has a beautiful grain. Plywood is another good option — it’s stable and doesn’t warp easily.
How long does it take to install?
The first shelf takes about an hour, including measuring, marking, and drilling. Each subsequent shelf is faster. A set of three shelves can realistically be done in a morning.
Final Thoughts
Floating shelves are one of the highest-impact, lowest-cost home improvements you can make. They transform bare walls into functional, attractive storage and display space, they work in every room, and they’re genuinely achievable as a DIY project even for beginners.
The investment is a few hours and a small amount of money for materials. The result lasts for years and makes a meaningful difference to how a room looks and functions.